Hello everyone, today I want to embark you on this wonderful journey which took place a couple of months ago. I again was somewhat bored while playing Minecraft in Survival Mode on my own server with some other people on it. A colleague of mine then sent me a zip file containing what seems to be a resource pack. If you don’t know about them, these contain descripting files and images to modify the look and feel of the game while keeping the gameplay itself vanilla.
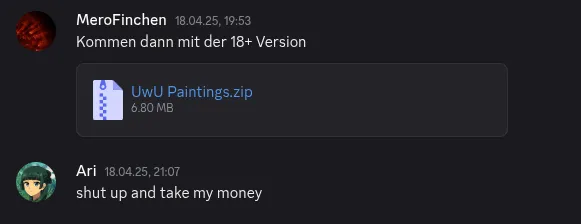 Mysterious zip file with an ambigious name ;)
 Of course my colleague was similarly bored and wanted to “enhance” his ingame experience. At the time I didn’t know what he was up to so I downloaded the file, imported it into Minecraft and took a look at it myself… Lets just say it has a very “unique” style
 To be fair, I also appreciate this kind of art
 He told me he would add some more content to it and that I should wait for another version. I was a bit annoyed since I would need to download another file, unload the current pack and replace it with the new one just for one or two more images. Then I thought, how about making a modification to the game that allows me to arbitrarily change any painting with an image of my own. This way I wouldn’t have to download a file from him everytime and we could both share new changes easily.
A new project idea was born
Creating modifications for Minecraft isn’t really as difficult as one may think. Different mod loaders such as FabricMC or CurseForge exist providing multiple interfaces to interact with the game and modify it in any way to your liking. Since I already knew Fabric from another project I worked on in the past I chose to use it for this project.
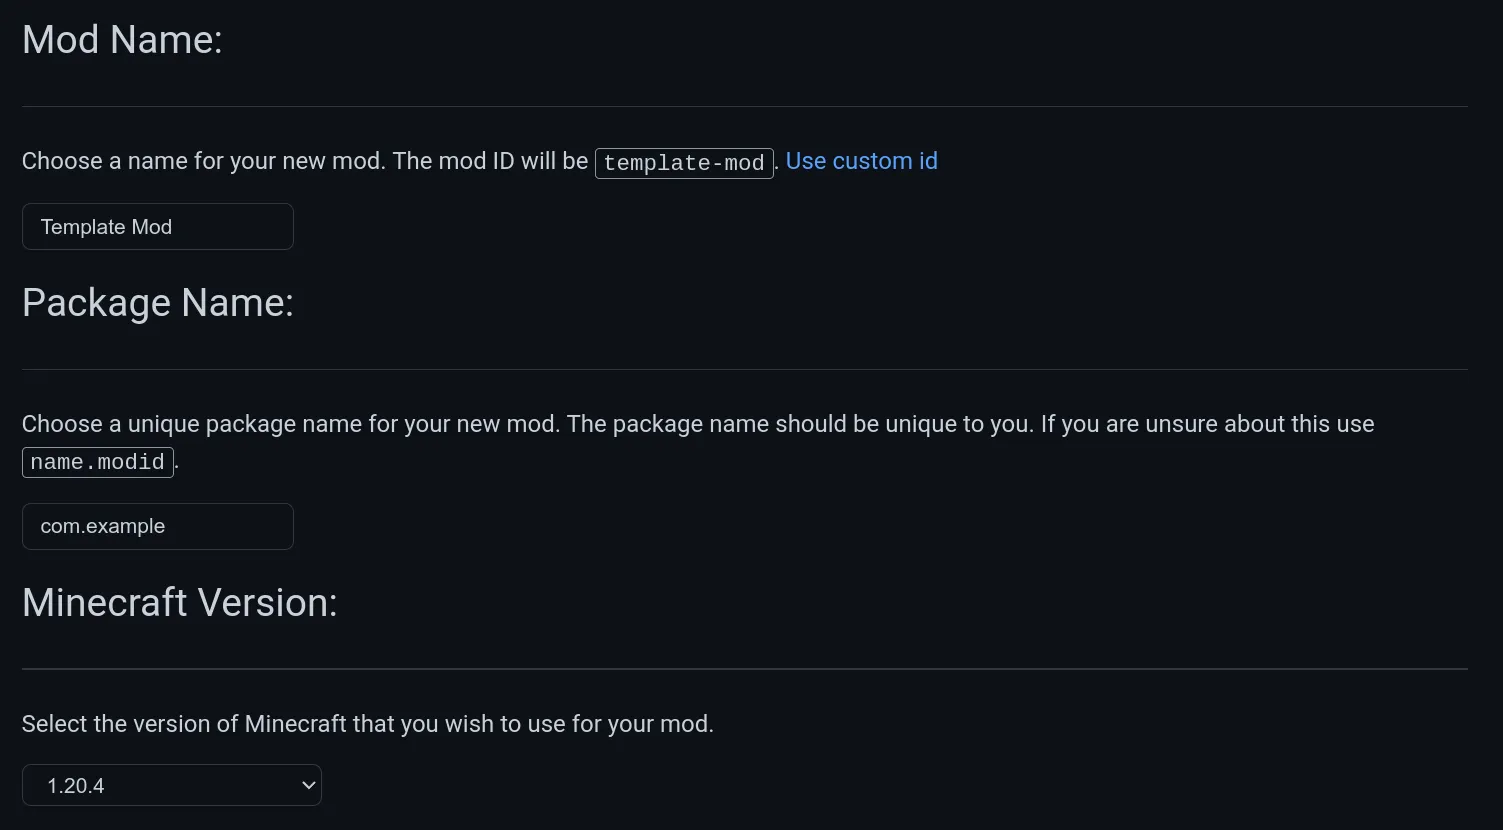
Setting up a project is straight-forward: You visit the Fabric Template Mod Generator, enter the necessary project information and download your project template. Of course the documentation is also the best guide to write a Fabric Mod.
After opening the project with IntelliJ I was greeted with multiple files and folders. They do not contain the source code of Minecraft itself as distributing it
is not allowed as their End-User License Agreement says. Instead we have a resource and a java folder containing
descriptive files/images and our modification logic respectively. But the question remains, how do we modify part of the source code if we don’t get access to it?
Decompiling the game
As said previously, we do not get access to the source code directly. But what we have is the final java application file Mojang distributes. Unfortunately for us this file itself is obfuscated by Mojang which makes modding alone difficult. Luckily Fabric created a project called Loom which automates the process of decompiling and remapping Minecraft. This means that a certain path to a class/method/variable is being paired with a new name given by the mapping used. The various places in the source code then get replaced by these new names aiding in making the code readable again.
These mappings of course are created by the community over a long period of time and there are mulitple to choose from, namely Yarn, Quilt Mappings and Mojang Mappings. I’ll be using Yarn Mappings since I am already familiar with them. Tools like Linkie make it easy to translate them to each other when reviewing source code of different projects.
Starting Point
Since I actually played the game for a while now (~10 years) and developed a lot of plugins in the past I somewhat knew the internals of the game. Paintings themselves are so-called entities, liveable/non-liveable things which do not identify as blocks or items. Each entity itself normally consists of three structures, one for describing the render process, one for describing the entity itself when living and one for miscellaneous stuff. Important for me is the render process.
Since the remapped source code of Minecraft gets added as a library to your project, you can search through these files by using CTRL + n. For the Painting Renderer,
the class is called PaintingEntityRenderer.
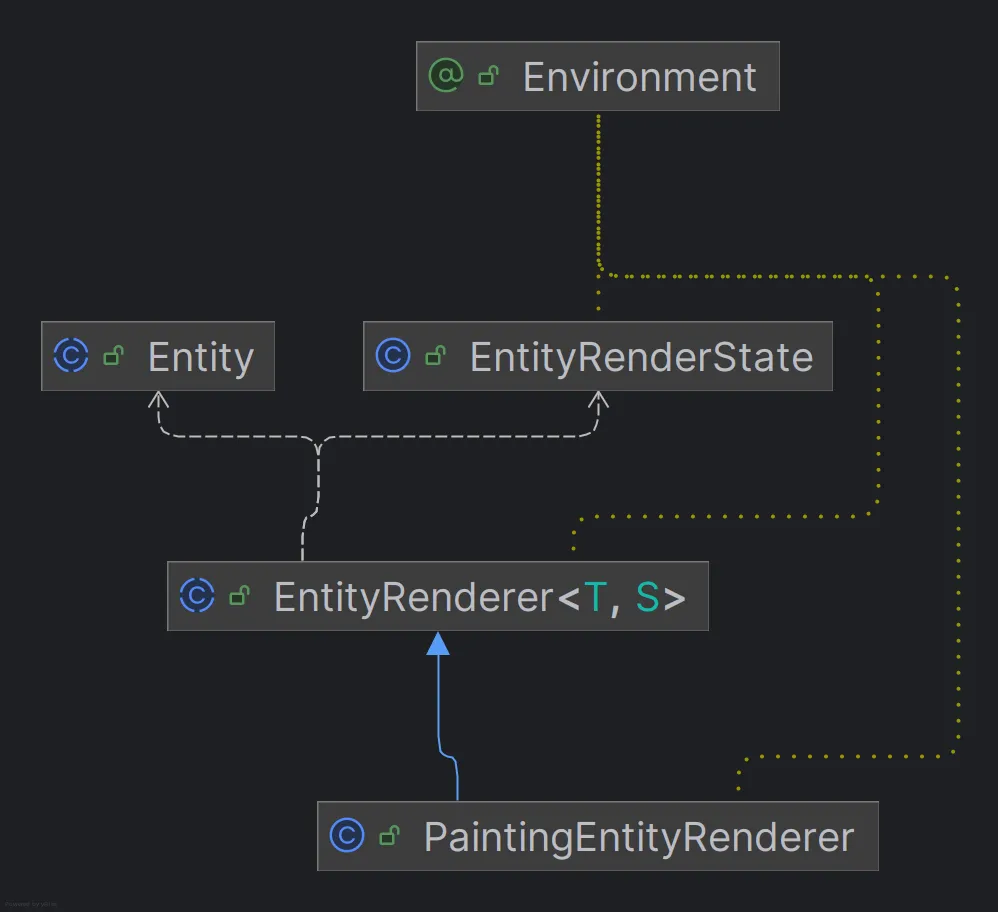
You can see that PaintingEntityRenderer extends from EntityRenderer which is a generic class coupled by the entity and the render state classes.
The EntityRenderer provides basic methods for rendering the entity but most entities override them since they need custom logic for rendering, such as
our painting.
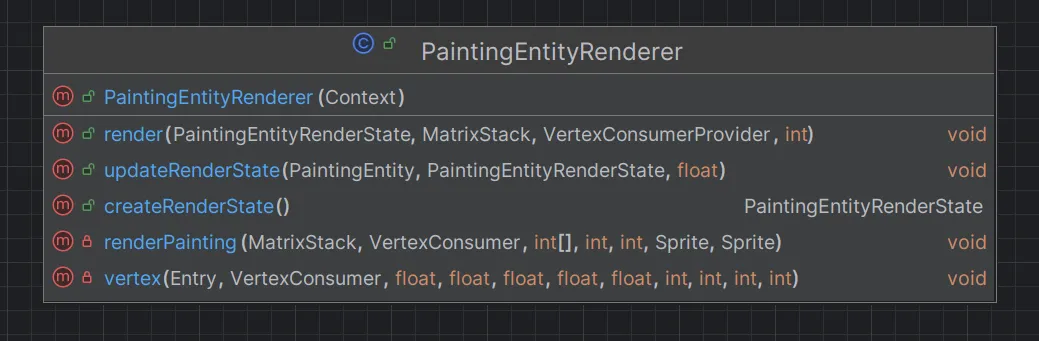
There are 5 methods, 3 of which were provided by the EntityRenderer parent: render, updateRenderState and createRenderState. Before we look further into
the rendering process, we should take a look at PaintingEntityRenderState to see if there is anything of interest.
public class PaintingEntityRenderState extends EntityRenderState {
    public Direction facing;
    @Nullable
    public PaintingVariant variant;
    public int[] lightmapCoordinates;

    public PaintingEntityRenderState() {
        this.facing = Direction.NORTH;
        this.lightmapCoordinates = new int[0];
    }
}
Interestingly enough, it seems like some kind of painting variant is being provided. Lets check that as well:
public record PaintingVariant(int width, int height, Identifier assetId,
                        Optional<Text> title, Optional<Text> author) {
    /* not of interest - shortened */
}
Unfortunately, no image object or path can be found here. That would’ve been a little bit too easy :). Rather we only get an Identifier called assetId.
When something is created in Minecraft, it always has some kind of id. Items, blocks, user-interfaces, entities and also images. Thus this variant class
provides the necessary assetId identifier for the painting asset. For us this only means further digging since we do not know yet where this identifier is being used
or what the renderer does with it.
Analyzing the Renderer
In the render pipeline in Minecraft calls the render method of each EntityRenderer. This one is being overriden in the PaintingEntityRenderer:
public void render(PaintingEntityRenderState paintingEntityRenderState, MatrixStack matrixStack, VertexConsumerProvider vertexConsumerProvider, int i) {
    PaintingVariant paintingVariant = paintingEntityRenderState.variant;

    if (paintingVariant != null) {
        matrixStack.push();
        matrixStack.multiply(RotationAxis.POSITIVE_Y.rotationDegrees((float)(180 - paintingEntityRenderState.facing.getHorizontalQuarterTurns() * 90)));

        PaintingManager paintingManager = MinecraftClient.getInstance().getPaintingManager();
        Sprite sprite = paintingManager.getBackSprite();
        VertexConsumer vertexConsumer = vertexConsumerProvider.getBuffer(RenderLayer.getEntitySolidZOffsetForward(sprite.getAtlasId()));
        this.renderPainting(matrixStack, vertexConsumer, paintingEntityRenderState.lightmapCoordinates, paintingVariant.width(), paintingVariant.height(), paintingManager.getPaintingSprite(paintingVariant), sprite);
        matrixStack.pop();

        super.render(paintingEntityRenderState, matrixStack, vertexConsumerProvider, i);
    }
}
There are some things going on here which might or might not make sense immediately which I will explain in a bit. But first I have to talk a about how Minecraft actually renders things. I am not a game dev or well-versed in graphics programming thus take my explanation with a grain of salt.
Minecraft uses OpenGL as the rendering library. Before the GPU does any rendering, the game first builds up all the vertex data per frame (for any given chunk / entity / particle / …). It then bundles this data and sends it in some kind of batch to the GPU. There these things can be rendered. To aid in specifying the rendering instructions, the game provides 2 classes.
First there is MatrixStack which keeps track of transformations to any given object. Second you also have VertexConsumerProvider
which abstracts the vertex buffer object (VBO) of OpenGL. This class helps to write vertex data into buffers which in turn get rendered.
This should clarify some things when analyzing the method:
- A local transformation context is being created (push / pop)
- The entity gets rotated around the y axis
- A sprite and the corresponding vertex consumer are being loaded
- A private
renderPaintingmethod gets called
Now we can take a look at the renderPainting method… Well this one unfortunately is a bit complicated since it involved as lot of ambigious variable names and lots of vertex drawing calls. To me it seemed like the actual process of drawing the paintings. This is something I did not want to modify early on since it might be a bit more complex. Thus we should dive into step 3, where the sprite and vertex consumer are being loaded. Maybe we can change the assets?
Exploring a Rabbit Hole
To see if we can change the assets in the load process we have to take a look at a couple of classes. First there is the Sprite class from which a buffer is being constructed.
public class Sprite {
    private final Identifier atlasId;
    private final SpriteContents contents;
    final int x;
    final int y;
    private final float minU, maxU, minV, maxV;

    public Sprite(Identifier atlasId, SpriteContents contents, int atlasWidth, int atlasHeight, int x, int y) {
        this.atlasId = atlasId;
        this.contents = contents;
        this.x = x;
        this.y = y;
        this.minU = (float)x / (float)atlasWidth;
        this.maxU = (float)(x + contents.getWidth()) / (float)atlasWidth;
        this.minV = (float)y / (float)atlasHeight;
        this.maxV = (float)(y + contents.getHeight()) / (float)atlasHeight;
    }
    // ...
}
Okay, there are some integer and float variables and two objects, a SpriteContents class and an atlas identifier… I was confused for a bit but then remembered
that Minecraft actually used to use one image for storing the different paintings. Upon looking into the resource files (which are by the way the same as in a resource pack)
I noticed that in newer versions there is just simply one folder named painting containing all the images.
This is a place where I should’ve been a bit more aware of the context because in reality, these images get stitched together to create one big image file in memory. They then get referenced by the x,y and u,v variables from the Sprite. But I was somewhat blinded by the SpriteContents class. Looking into it also reveals why:
// shortened for readability
public class SpriteContents implements TextureStitcher.Stitchable, AutoCloseable {
    private final Identifier id;
    final int width;
    final int height;
    private final NativeImage image;

    public SpriteContents(Identifier id, SpriteDimensions dimensions, NativeImage image) {
        this.id = id;
        this.width = dimensions.width();
        this.height = dimensions.height();
        this.image = image;
        // ...
    }
    // ...
}
A native image is part of the SpriteContents class. To me it seemed like the big milestone I had just found. And it also make sense: These images get loaded from the stitched texture and have to be stored somewhere.
I constructed a prototype which creates a NativeImage object from a remote url and overrides it in the sprite being loaded in the render method. Eagerly
waiting for the game to load, I immediately placed the image and was suprised to see nothing but a big red error in my console. Somehow the pointer to the image
buffer was NULL? But I just initialized the image, why was it being set to zero?
Unfortunately, I still don’t know why ;). Maybe the image objects need to be frozen or created in a special way. I hope someone can tell me but for now this was not the way to do it.
I also went into the rabbit hole of looking into the SpriteAtlas and how it got stitched togehter. Don’t worry, I will spare you with the details. It was painful to say the least and took me around 2 days with no progress at all. There were some funny mistakes happening such as me accidentally rendering the sprite atlas:
A new plan had to be forged
And so I took a step back. Remember the private drawPainting method I hadn’t touched since I didn’t want to engage in the render pipeline?
Well, I did decide to take a look at it. But this time I was more keen on achieving a result. I knew that if this would fail I would just leave this project
in the dust, never to be seen again.
So, I took the method and cleaned it up. It took some time but this is my final result:
private void renderPainting(
        MatrixStack matrices, VertexConsumer vertexConsumer, int[] lightmapCoordinates, int width, int height, Sprite paintingSprite, Sprite backSprite
) {
    MatrixStack.Entry entry = matrices.peek();
    float halfWidthOffset = -width / 2.0F;
    float halfHeightOffset = -height / 2.0F;
    float relLayerWidth = 0.03125F;
    float minU = backSprite.getMinU();
    float maxU = backSprite.getMaxU();
    float minV = backSprite.getMinV();
    float maxV = backSprite.getMaxV();

    float innerV = backSprite.getFrameV(0.0625F);
    float innerU = backSprite.getFrameU(0.0625F);
    double widthStep = 1.0 / width;
    double heightStep = 1.0 / height;

    for (int u = 0; u < width; u++) {
        for (int v = 0; v < height; v++) {
            float x1 = halfWidthOffset + (u + 1);
            float x0 = halfWidthOffset + u;
            float y1 = halfHeightOffset + (v + 1);
            float y0 = halfHeightOffset + v;

            int lightMap = lightmapCoordinates[u + v * width];
            float textureU0 = paintingSprite.getFrameU((float)(widthStep * (width - u)));
            float textureU1 = paintingSprite.getFrameU((float)(widthStep * (width - (u + 1))));
            float textureV0 = paintingSprite.getFrameV((float)(heightStep * (height - v)));
            float textureV1 = paintingSprite.getFrameV((float)(heightStep * (height - (v + 1))));

            // Drawing image content itself
            this.vertex(entry, vertexConsumer, x1, y0, textureU1, textureV0, -relLayerWidth, 0, 0, -1, lightMap);
            this.vertex(entry, vertexConsumer, x0, y0, textureU0, textureV0, -relLayerWidth, 0, 0, -1, lightMap);
            this.vertex(entry, vertexConsumer, x0, y1, textureU0, textureV1, -relLayerWidth, 0, 0, -1, lightMap);
            this.vertex(entry, vertexConsumer, x1, y1, textureU1, textureV1, -relLayerWidth, 0, 0, -1, lightMap);

            // Drawing borders and backside
            this.vertex(entry, vertexConsumer, x1, y1, maxU, minV, relLayerWidth, 0, 0, 1, lightMap);
            this.vertex(entry, vertexConsumer, x0, y1, minU, minV, relLayerWidth, 0, 0, 1, lightMap);
            // ... (+ 20 more calls)
        }
    }
}
Now this is a lot easier to understand. What happens here is fairly simple:
- Some variables about the min and max u and v are being set up
- Two for-loops iterating from 0 to width and height respectively
- x and y coordinates are being calculated
- Multiple vertex calls for the image content and the borders / backsides
Why the game uses two for loops you might ask? Well, picture this: The entity itself is a big entity, in this case 3 blocks wide and 2 blocks high.
But the game does more than simply drawing an image. It also draws the borders and the backside. Because of that it divides the image into multiple chunks referenced by u and v.
x0, x1, y0, y1 in this case reference the start to end point on the entity itself (thus 0 to the maximum amount of drawing chunks).
Since I was still scared a bit about modifying those function calls or the parameters which went into them I took the easy route. This was my plan:
- Redirect the function call to the private renderPainting method to my own method
- In my own method, call a custom renderPainting method in which the image content is drawn depending on a boolean value
- Write custom rendering code resembling the one in the renderPainting method to draw my own image
Straight-forward and fairly simple to implement. Before I show you my result and some funny mistakes I encountered, I need to talk a bit about modifying the source code - after all I didn’t tell anything about that yet.
Mixins
Since the remapped source code is just being added as a library to the project, I cannot modify the source code. There are ways to do that like using MCP-Reborn but this doesn’t work well with other mods and requires the whole client jar file to be replaced, not just loading one mod via Fabric.
This is where Mixin comes in handy! To quote the mixin wiki:
Mixin is a framework for modifying Java programs during runtime by injecting code into targeted methods and classes.
So, in a nutshell, we can inject our own code into Minecraft however we want. Well, not directly code, but rather method calls. There are also possibilities to:
- Access private fields / methods of classes
- Redirect function invocations
- Changing return statements
Mixin classes reference the class to be tinkered with and contain methods / variables with decorators to override certain methods / fields.
Now that we know how to inject our code into Minecraft, we can start building the final product!
Time to build!
First, I have to redirect the function call to the private renderPainting method. I did this by creating my own renderPainting method which is a bit modified through
the addition of the parameter renderOriginal. This deciedes whether to render the real painting (I still want to keep originals if I did not override them).
I also created the actual mixin redirect method. Don’t get intimidated by the long method string.
When working with mixins, you have to specifiy the full path of a class or method.
@Redirect(method="render(Lnet/minecraft/client/render/entity/state/PaintingEntityRenderState;Lnet/minecraft/client/util/math/MatrixStack;Lnet/minecraft/client/render/VertexConsumerProvider;I)V",
            at=@At(value="INVOKE", target="Lnet/minecraft/client/render/entity/PaintingEntityRenderer;renderPainting(Lnet/minecraft/client/util/math/MatrixStack;Lnet/minecraft/client/render/VertexConsumer;[IIILnet/minecraft/client/texture/Sprite;Lnet/minecraft/client/texture/Sprite;)V"))
private void remotePainting$injectRemovePaintingRenderer(PaintingEntityRenderer instance, MatrixStack matrices, VertexConsumer vertexConsumer, int[] lightmapCoordinates, int width, int height, Sprite paintingSprite, Sprite backSprite, @Local(argsOnly = true) PaintingEntityRenderState paintingEntityRenderState) {
    if (paintingEntityRenderState.variant == null) {
        this.renderPainting(matrices, vertexConsumer, lightmapCoordinates, width, height, paintingSprite, backSprite, true);
        return;
    }

    @Nullable RemotePaintingRegistry.Entry remotePaintingEntry = RemotePaintingRegistry.getRemotePainting(paintingEntityRenderState.variant.assetId());
    boolean renderOriginal = remotePaintingEntry == null;
    this.renderPainting(matrices, vertexConsumer, lightmapCoordinates, width, height, paintingSprite, backSprite, renderOriginal);
}
After running the client with the mod, this is the result produced:
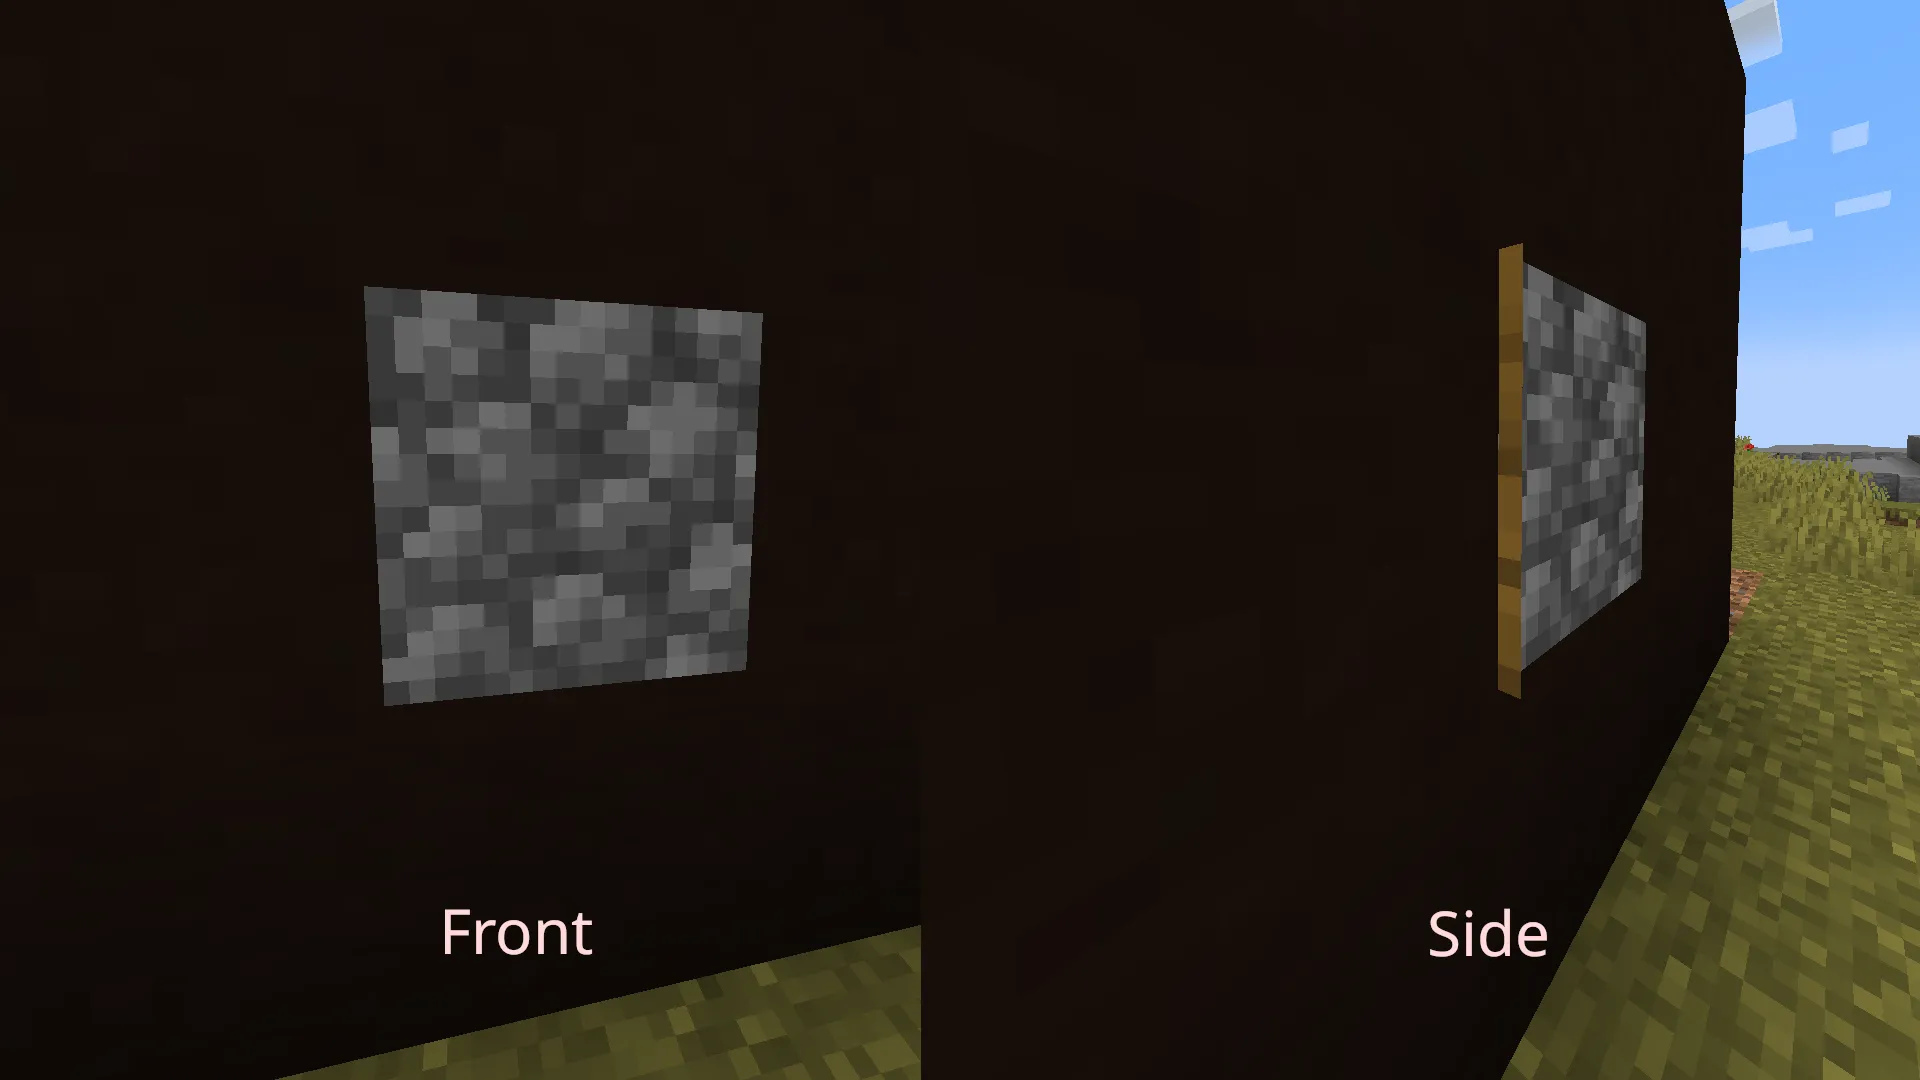 If you look at it from the side, you see the border
 Now for the fun part: I get to draw a custom image on top of it! This method gets injected before the matrixstack pop call so just right before the frame closes.
@Inject(method="render(Lnet/minecraft/client/render/entity/state/PaintingEntityRenderState;Lnet/minecraft/client/util/math/MatrixStack;Lnet/minecraft/client/render/VertexConsumerProvider;I)V",
            at=@At(value="INVOKE", target="Lnet/minecraft/client/util/math/MatrixStack;pop()V"))
private void remotePainting$injectCustomPaintingRenderer(PaintingEntityRenderState paintingEntityRenderState, MatrixStack matrixStack, VertexConsumerProvider vertexConsumerProvider, int i, CallbackInfo ci) {
    if (paintingEntityRenderState.variant == null) return;

    @Nullable RemotePaintingRegistry.Entry remotePaintingEntry = RemotePaintingRegistry.getRemotePainting(paintingEntityRenderState.variant.assetId());
    if (remotePaintingEntry == null) {
        return;
    }

    matrixStack.push();
    RenderSystem.setShaderTexture(0, remotePaintingEntry.customIdentifier());
    RenderLayer layer = RemotePaintingsMod.getRemotePaintingRenderLayer(remotePaintingEntry.customIdentifier());
    VertexConsumer customConsumer = vertexConsumerProvider.getBuffer(layer);
    MatrixStack.Entry entry = matrixStack.peek();
    int width = paintingEntityRenderState.variant.width();
    int height = paintingEntityRenderState.variant.height();

    //noinspection SwitchStatementWithTooFewBranches
    switch (remotePaintingEntry.contentType()) {
        case GIF -> renderGif(remotePaintingEntry, entry, customConsumer, width, height);
        default -> renderImage(remotePaintingEntry, entry, customConsumer, width, height);
    }

    matrixStack.pop();
}
For some context, I created a custom registry to keep track of the images being overriden. Images loaded from the internet get registered there. There is just one special thing I had to add for them to be a known thing for Minecraft: Register them in the TextureManager:
TextureManager manager = MinecraftClient.getInstance().getTextureManager();
manager.registerTexture(entry.customIdentifier(), image);
The texture manager is what keeps track of all the textures in the game, whether they are an atlas or just a simple image. By using identifiers with a custom namespace, I get to have them in the client without overriding any existing textures.
Now for the actual rendering part:
@Unique
private void renderImage(RemotePaintingRegistry.Entry remotePaintingEntry, MatrixStack.Entry entry, VertexConsumer vertexConsumer, int width, int height) {
    float halfWidthOffset = -width / 2.0F;
    float halfHeightOffset = -height / 2.0F;

    // this stretches the whole image across the painting
    float x0 = halfWidthOffset;
    float x1 = halfWidthOffset + width;
    float y0 = halfHeightOffset;
    float y1 = halfHeightOffset + height;

    // lower left
    this.vertex(entry, vertexConsumer, x1, y0, 0, 1, -0.03125F, 0, 1, 0, 15728880);
    // top left
    this.vertex(entry, vertexConsumer, x0, y0, 1, 1, -0.03125F, 0, 1, 0, 15728880);
    // top right
    this.vertex(entry, vertexConsumer, x0, y1, 1, 0, -0.03125F, 0, 1, 0, 15728880);
    // bottom right
    this.vertex(entry, vertexConsumer, x1, y1, 0, 0, -0.03125F, 0, 1, 0, 15728880);
}
As you can see, I do not make use of any for-loops. I can simply draw the image over the entirety of the entity. And that’s it! That is the final piece of code to render a custom image. And take a look, it’s beautiful!
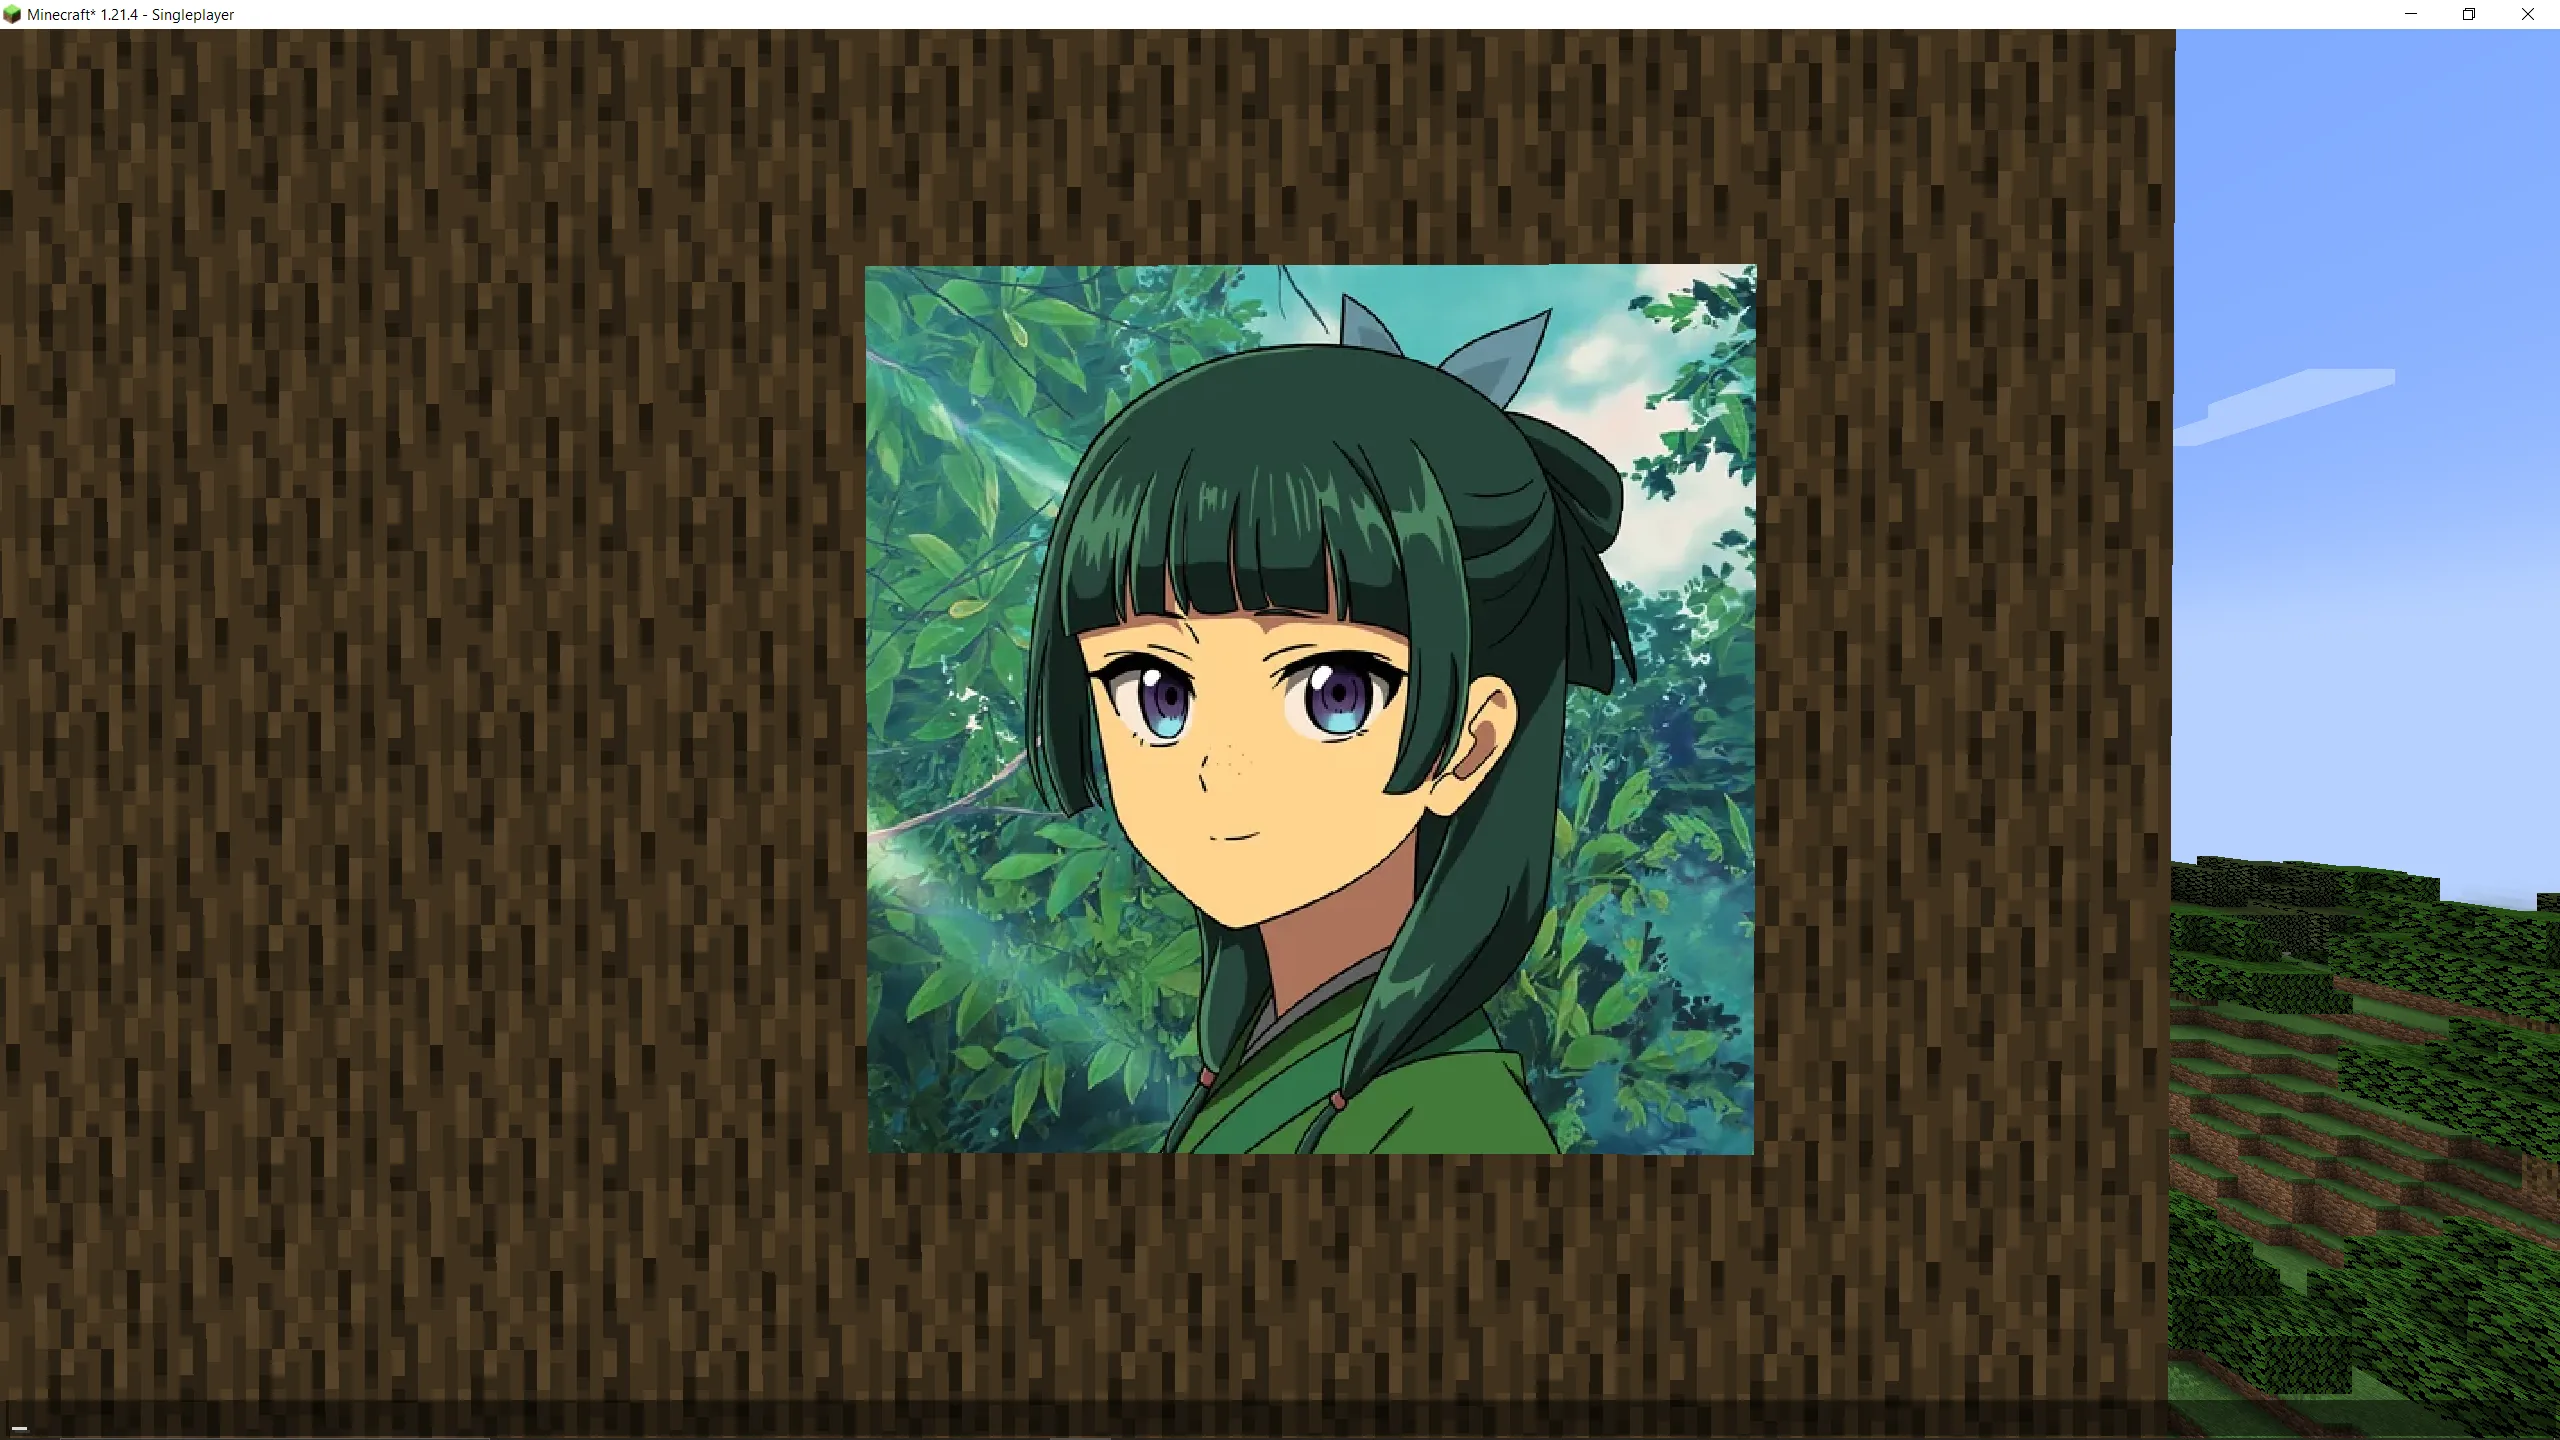 Maomao looks even more beautiful when placed in another world
 Some last words
I thank you for reading through this article. It has been an incredible journey working myself through the client. In total I spent 2 weeks from start to completion. And I also think that it’s incredibly valuable to step into a rabbit hole such as I did. Failing is part of the process and it really drained my motivation level. But I knew that the project was possible and continued traveling along the path to success. And I encourage you to do the same!
The mod itself can be downloaded on Modrinth. I’ve added commands and even the ability to override paintings with GIFs. If you want to delve a bit further into Minecraft Modding, I encourage you to create your own mod. May it be something silly as overriding paintings, turning sheeps into rainbow-powered super-jets or just adding little secrets. Modding is an incredible learning journey since you have to read and understand code from another person. And you can directly modify it.
I can also recommend watching the Minecraft modding series from LiveOverflow. He does go a lot more into technical details and explains them beautifully. Helps to get a deep grasp of the topic.
Funny mistakes

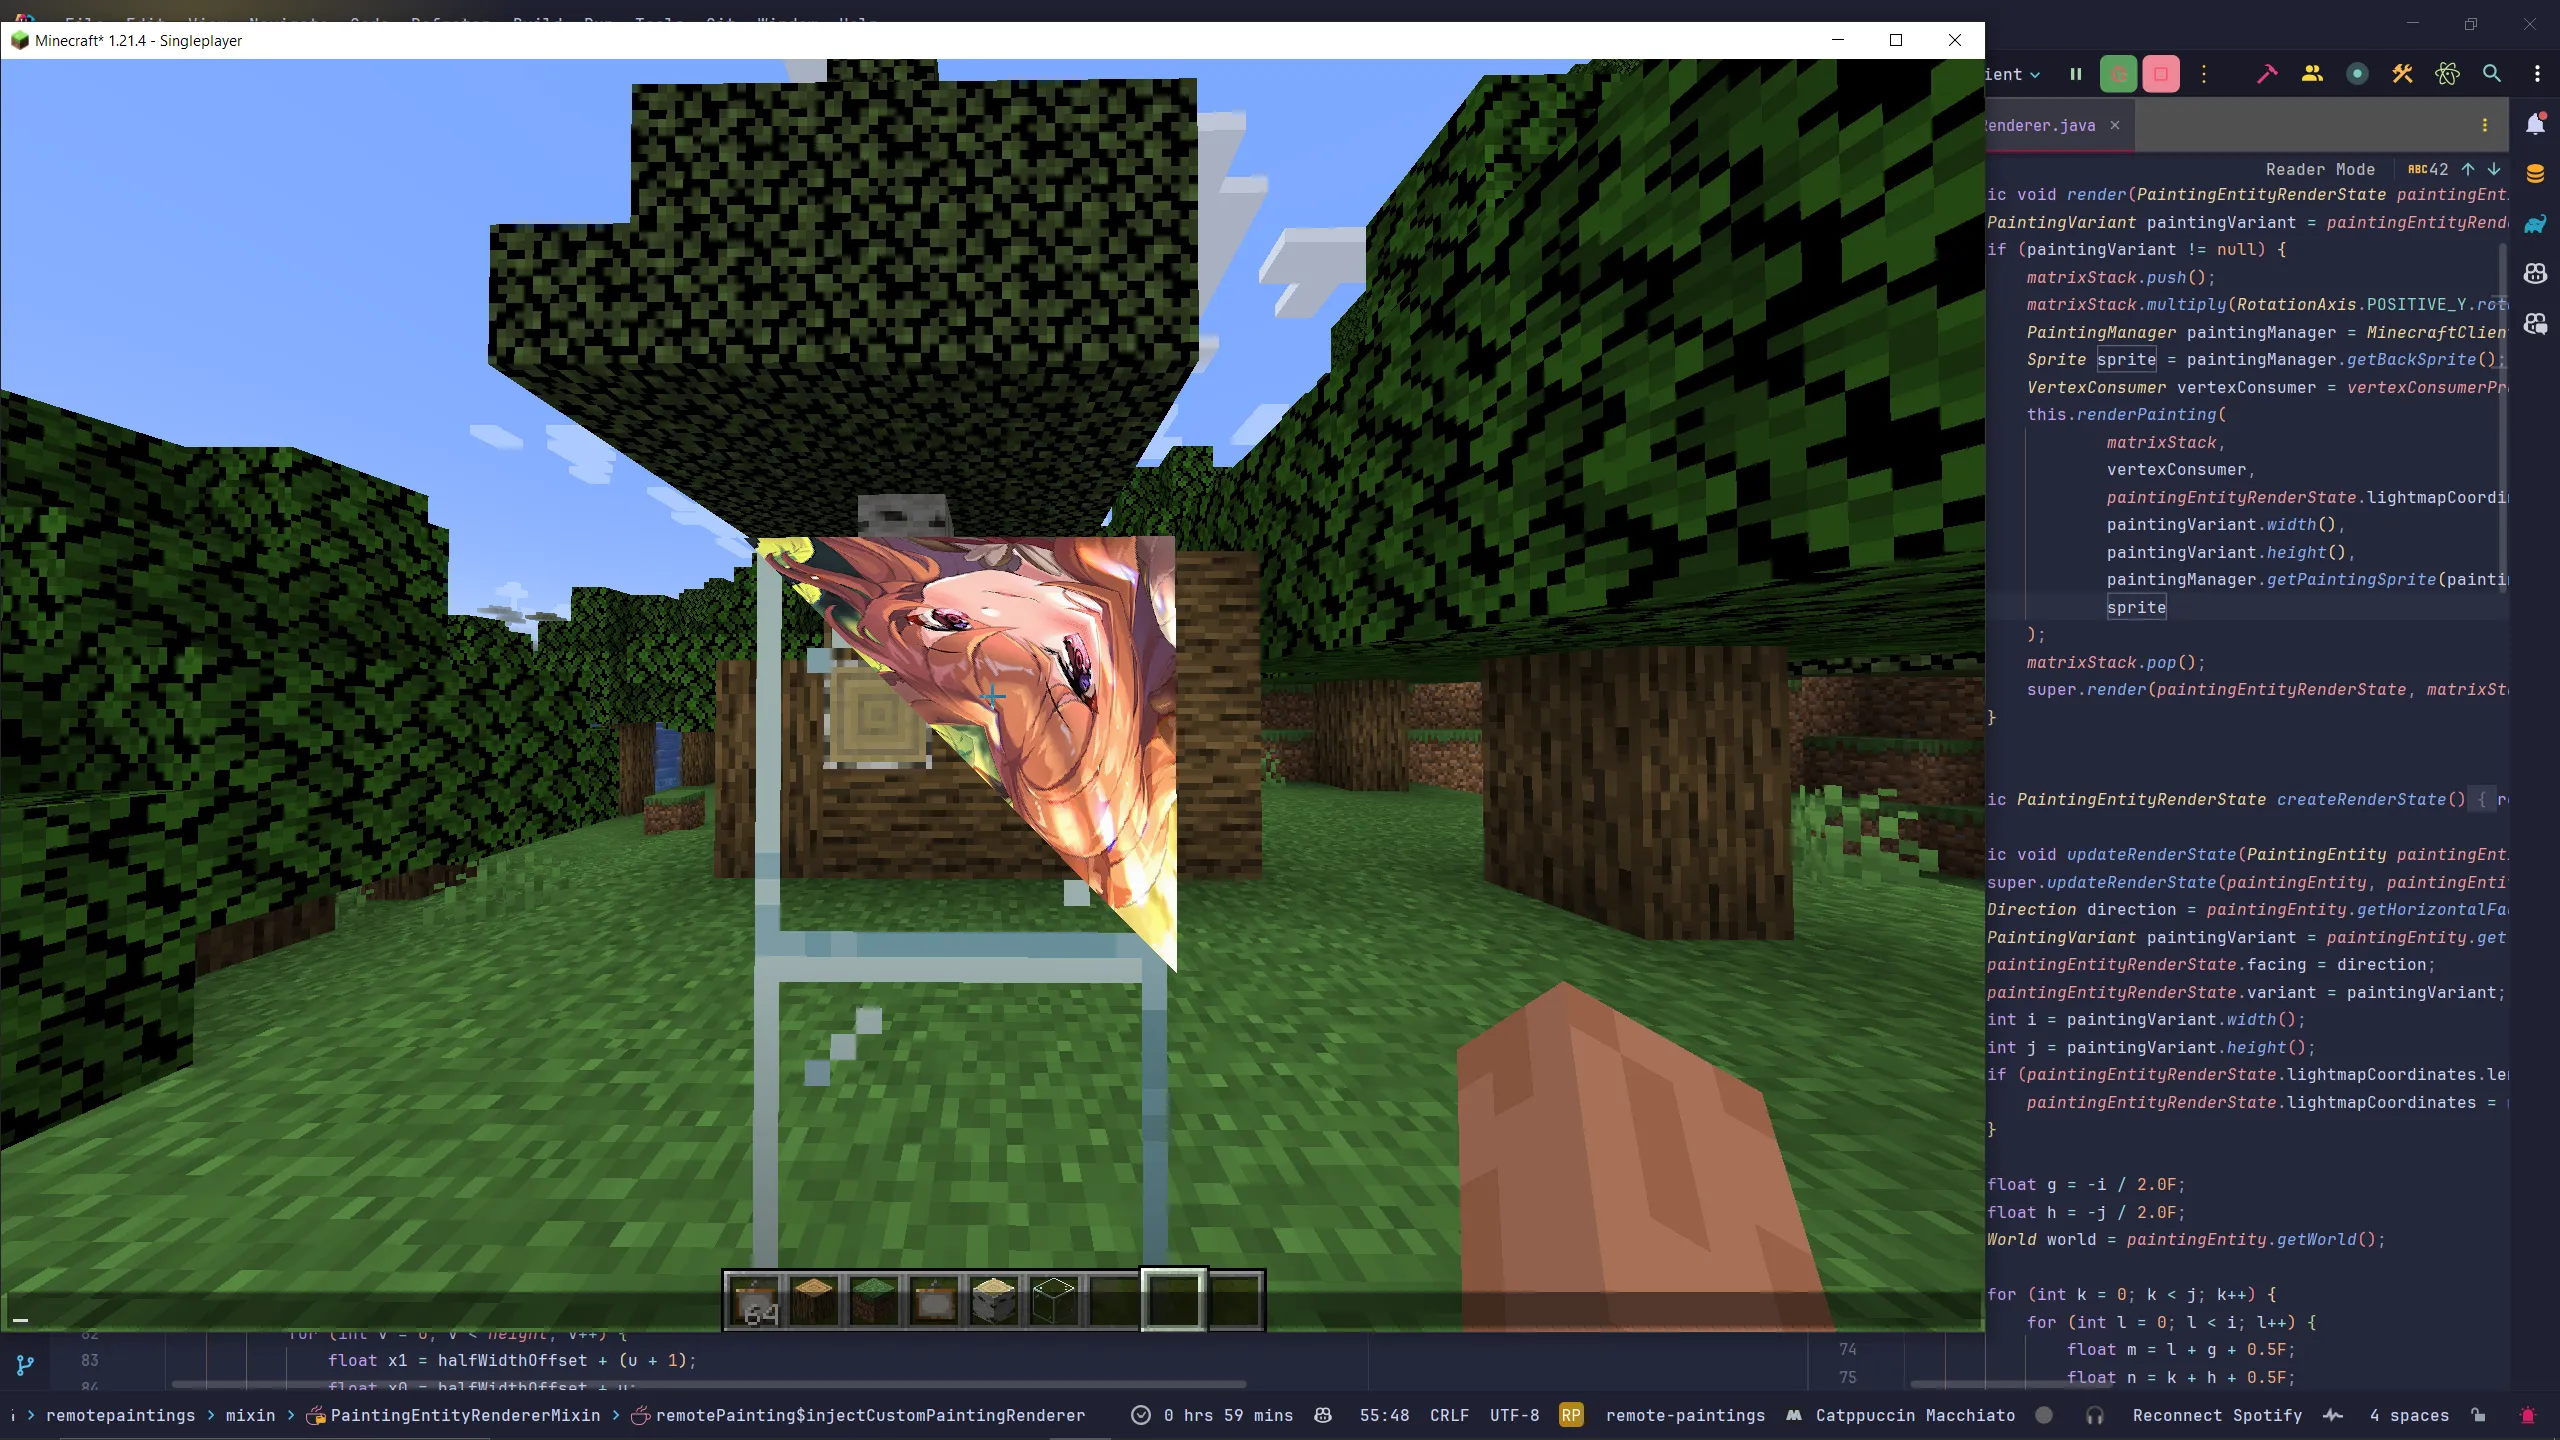 I think I messed with magic numbers again...
Me trying to get GIFs working: